Car Trouble Fixer

Cigarette Burn in Car Seat Repair: DIY Guide & Costs

Introduction
Exploring cigarette burn in car seat repair techniques in this introduction is your first step toward decoding auto interior estimates, understanding fabric fiber blending and leather filler compounds, and restoring your vehicle’s cabin finish across the United States.
Discovering an unsightly blemish on your vehicle’s interior can be frustrating, but mastering a professional cigarette burn in car seat repair helps you restore your cabin’s flawless finish on a tight budget. Taking your car to an upholstery shop for a minor burn hole can cost anywhere from $80 to $300 in artisan labor, while full seat reupholstering runs into hundreds or thousands of dollars.
Fortunately, minor damage can be successfully fixed right in your garage using inexpensive DIY kits and proper techniques. Whether you are dealing with a pre-owned vehicle purchase or an unexpected accident, learning the right restoration steps saves you from high professional service costs. In auto parts retail stores and specialty interior markets nationwide, typical supplies range from $20 to $50 for a complete DIY repair compound kit, $100 to $250 for mobile professional technicians, and $400 to $1,000+ for factory-matching seat cover replacement.
As a car owner navigating U.S. roadways, understanding these potential expenses and procedures helps you budget effectively and manage your interior care options. This comprehensive guide breaks down pricing by damage category, necessary tools, step-by-step workflows, and professional shop rates to ensure you are fully prepared to maintain a pristine driving presentation.
Understanding how to trim away melted, charred seat fibers and insert a high-strength canvas sub-patch beneath the burn to prevent the hole from expanding, recognizing the importance of mixing custom-colored fabric lint or leather tint compounds to match your factory interior, and evaluating DIY patch kits versus professional mobile upholstery specialists empowers vehicle owners to make smart financial and aesthetic choices.
Throughout this introduction and the comprehensive guide that follows, we will explore an in-depth breakdown of cigarette burn in car seat repair, detailing professional shop pricing matrices, interior damage severity thresholds (such as surface fabric burns versus deep foam cushion charring), step-by-step cleaning, trimming, sub-patch insertion, adhesive application, fiber or filler blending, and curing workflows, and practical answers to frequently asked questions to keep your car’s interior looking showroom-fresh on every American journey.
Symptoms and Damage Classification
Accurately evaluating the nature of your seat burn determines whether a $20 DIY kit will work or if professional upholstery replacement is necessary.
Cloth Seat Burns: Hard, melted plasticized edges surrounding a dark carbon crater, often with sunken foam padding underneath.
Leather & Vinyl Burns: Fused, hardened edges with a depressed center crater where synthetic grain melted away.
Depth Assessment: Surface singes require light cleaning, whereas deep holes require backing patches and specialized fillers.
Risk Level: Low for structural safety; High for vehicle aesthetics and trade-in value.
Safety Assessment: Can You Fix It Cheaply or Is Shop Help Needed?
Before purchasing repair compounds, evaluate the burn severity to ensure safe and successful results:
Monitor / Minor Surface Singe: Faint discoloration on cloth fibers correctable with light fabric cleaner and soft brushing.
Service Soon (Ideal for Cheap DIY): Small burn holes smaller than a dime on cloth, leather, or vinyl ($15–$25 repair kit).
Urgent Professional Repair: Large burns spanning across heated seat elements or complex leather seams.
Replace Immediately: Severely shredded seat foam or structural frame damage.
Common Causes of Car Seat Burns in the U.S.
U.S. vehicle owners encounter seat burns through several everyday situations:
Accidental Smoking Slips: Careless ash drops or cigarette rolls slipping from fingers while driving on U.S. highways.
Passenger Mishaps: Passenger smoking or improperly extinguished cigarette butts resting against seat cushions.
Utility Sparks: Occasional rogue sparks from portable lighters or auxiliary dashboard tools.
Required Tools and Materials for Seat Repair
To perform a professional-grade cigarette burn in car seat repair at home, gather the following budget-friendly tools and supplies:
| Tool / Material | Function in Seat Repair | Estimated U.S. Price |
| Fabric / Carpet Repair Kit | Provides backing fabric, adhesive, and color-matched velour fibers for cloth seats | $15 – $25 |
| Leather & Vinyl Repair Kit | Contains flexible filler compounds, grain paper, and color tint mixing guides | $15 – $25 |
| Precision Hobby Scissors & Razor | Trims away burned, hardened fabric or leather edges cleanly | $5 – $10 |
| Cotton Balls / Foam Wadding | Rebuilds sunken seat padding underneath the burn crater | $3 – $5 |
| Isopropanol Alcohol (91%) | Cleans and degreases the damaged area prior to adhesive bonding | $3 – $5 |
DIY Safety Equipment and Best Practices
Working with chemical fabric adhesives, heat tools, and color pigments requires adherence to basic safety guidelines:
Ventilation: Work in an open garage or well-ventilated area to dissipate adhesive fumes.
Glove Protection: Wear nitrile gloves to avoid getting permanent fabric glue or leather tint on your skin.
Test Application: Always test mixed color fibers or leather tints on a hidden spot under the seat before applying them to the visible burn repair.
Step-by-Step Cigarette Burn in Car Seat Repair Guide
Follow these cost-effective steps depending on whether your car features cloth or leather upholstery:
Cleaning and Trimming the Burn: Use sharp hobby scissors or a razor blade to carefully trim away all melted, charred fibers or hard leather edges around the burn hole. Clean the exposed crater thoroughly with rubbing alcohol and let it dry. If foam padding is missing, pack clean cotton wadding into the base to level the surface.
For Cloth Seats (Patch and Flock Method): Cut a small circle of backing fabric slightly larger than the burn hole and slip it underneath the hole using tweezers. Apply a thin layer of fabric repair adhesive over the backing patch. Select or mix matching colored velour fibers from your kit, sift them evenly over the wet glue using a mesh sieve, and press gently to blend the texture. Let it cure completely.
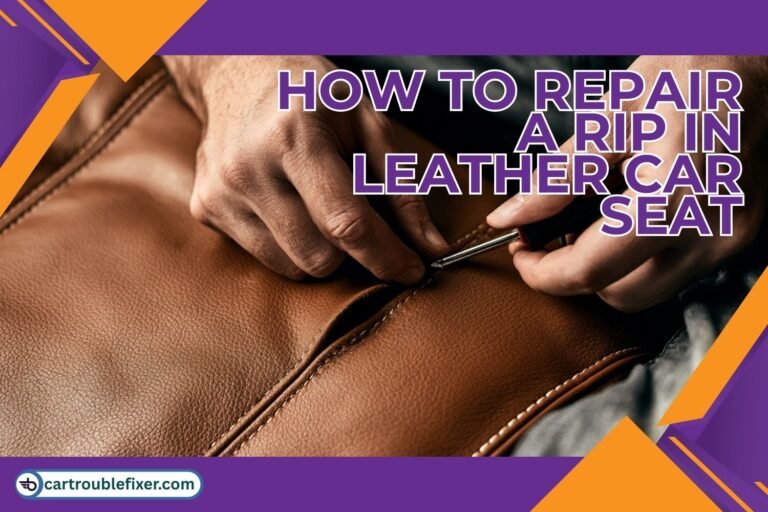
For Leather and Vinyl Seats (Filler Method): Squeeze flexible leather repair compound into the burn crater, building it up in thin layers. Mix pigment tint drops into the compound until it matches your seat color. Press a grain texture paper sheet (included in your kit) over the wet filler and apply heat cautiously with a warm iron or heat tool if specified by your kit instructions to emboss the leather grain pattern.
Final Buffing and Inspection: Once cured, gently peel away the texture paper and inspect the blend. Lightly dab matching leather color tint over the repair if minor tone adjustments are needed.
Common DIY Seat Repair Mistakes to Avoid
Avoid these frequent mistakes when attempting budget upholstery repairs:
Skipping the Backing Patch on Cloth: Forcing glue directly onto bare foam without a backing cloth, causing the repair patch to sink under body weight.
Applying Thick Layers of Leather Filler: Squeezing too much leather compound into the burn at once, resulting in cracking and poor curing.
Ignoring Color-Matching Tests: Applying custom-mixed dye directly without testing, resulting in a noticeable discoloration spot.
Repair Cost Comparison: DIY vs. Professional Upholstery Shop
Tackling seat burn repairs yourself yields massive financial savings compared to professional upholstery shop visits.
| Repair Scope | Estimated U.S. Cost Range | Time Commitment |
| DIY Fabric / Leather Repair Kit | $15 – $25 | 45 – 60 Minutes |
| Professional Upholstery Spot Repair | $80 – $300 | 1 – 2 Hours |
| Full Car Reupholstering | $1,000 – $4,000+ | 2 – 5 Days |
Regional U.S. Climate Considerations
Your regional U.S. climate affects how upholstery repair adhesives and fillers cure:
Northern Winter States: Cold garage temperatures prevent fabric glues and leather fillers from curing properly; perform repairs inside a heated room or use space heaters.
Southern Sunbelt States: High ambient heat causes repair compounds to skin over too rapidly; work in shaded garage environments.
Frequently Asked Questions (FAQs)
1. Can a cigarette burn in a car seat be repaired, or does the entire upholstery need to be replaced?
In most cases, a cigarette burn can be repaired without replacing the entire seat. Professional upholstery technicians use specialized repair kits, re-weaving techniques, or matching fabric and leather materials to restore the damaged area. This makes cigarette burn in car seat repair a cost-effective solution that can leave the damage barely noticeable.
2. How do professionals fix a cigarette burn in a cloth car seat versus a leather seat?
For cloth seats, technicians typically trim away the melted, charred fibers, fill the void with a specialized backing adhesive, and then apply finely chopped fiber fuzz (shaved from a hidden area like under the seat) that matches the surrounding upholstery color and texture. For leather or vinyl seats, the burn is cleaned out, a backing patch is inserted, the hole is filled with a flexible leather compound, and the surface is textured and color-matched using specialized airbrush paints.
3. Can I use a DIY cigarette burn repair kit at home, and do they work well?
Yes, DIY cigarette burn repair kits are widely available online and can work reasonably well for tiny burns on dark, textured cloth seats. However, matching exact colors, grain patterns, and leather textures can be quite challenging for beginners. If the burn is in a highly visible area on expensive leather or light-colored upholstery, a DIY attempt may leave a noticeable blemish, making professional repair the better choice.
4. How long does a cigarette burn car seat repair take to complete?
Most professional cigarette burn repairs are surprisingly quick, typically taking anywhere from 30 minutes to 2 hours depending on the material (cloth vs. leather) and the location of the damage. Once the patching compounds, adhesives, or specialized curing heat lamps finish setting, the seat is usually ready for immediate normal use.
5. Will a repaired cigarette burn hole hold up over time and regular daily use?
Yes, professional repairs use industrial-grade adhesives, flexible fillers, and heat-cured resins designed to withstand the friction, stretching, and temperature changes of daily driving. While extreme friction or direct scraping can eventually wear down a patch over years of heavy use, a properly executed repair will maintain its integrity and appearance for a very long time.
Final Takeaway
A cigarette burn on your car seat doesn’t have to mean you have to endure an unsightly blemish or pay hundreds of dollars for professional reupholstering. By purchasing an affordable DIY fabric or leather repair kit, carefully trimming damaged fibers, and following structured patching and filling steps in your garage, you can successfully achieve professional-quality cigarette burn in car seat repair and restore your vehicle’s clean appearance.