Car Trouble Fixer

How to Repair Leather Seat in Car: DIY Steps, Kits & U.S. Cost Guide

Introduction
Learning how to repair leather seat in car allows you to fix unsightly cracks, deep tears, cigarette burns, and scuffs without paying thousands for full re-upholstery. Minor surface scratches and hairline cracks can be repaired at home in 1–2 hours using a $20 to $45 DIY leather repair kit containing liquid leather filler, sub-cloth backing patches, and color-matched leather dye. For small to medium damage, cleaning the area with isopropyl alcohol, inserting a backing patch under tears, applying flexible filler, sanding smooth, and blending dye restores seat appearance to near-factory condition. Professional upholstery shops charge between $150 and $500 per seat panel for complex structural damage.
Understanding how to repair leather seat in car safely ensures that U.S. drivers can maintain their vehicle’s interior appearance and avoid expensive shop labor fees. Every vehicle owner researching how to repair a leather seat in a car must evaluate damage size, location, and filler kit instructions before starting. Mastering how to repair a leather seat in a car protects you, your passengers, and your vehicle’s resale value across American roadways. Let’s explore everything you need to know about how to repair leather seat in car efficiently and correctly.
SAFETY & AIRBAG WARNING: If your car leather seat contains built-in side airbags (marked with an ‘AIRBAG’ tag on the outer seam), never apply heavy glue or liquid filler across the breakaway airbag seam. Doing so can impede airbag deployment during a crash.
Types of Car Leather Seat Damage and What Can Be Fixed
Car leather seats experience constant friction, sun UV exposure, and temperature swings. Identifying the specific type of damage helps you choose the correct repair method:
1. Hairline Cracks and Creases (Surface Wear): Outer side bolsters dry out and crack due to friction from entering and exiting the vehicle. These superficial cracks affect only the protective top color coat and are the easiest DIY fix using flexible leather filler and dye.
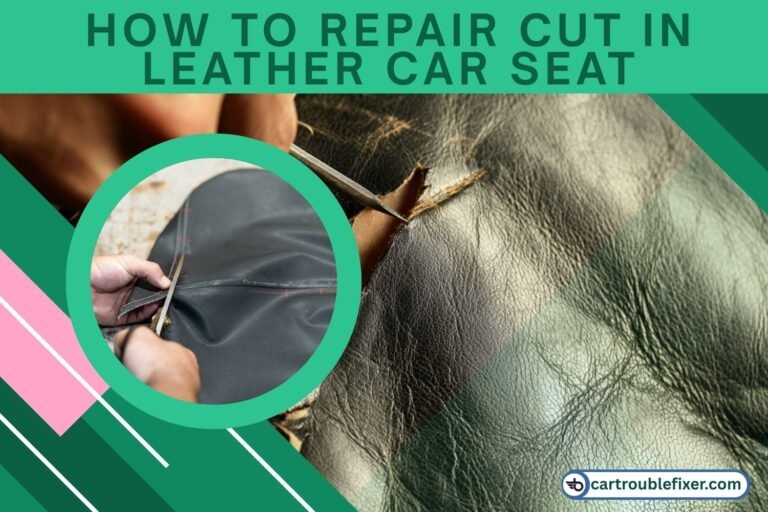
2. Open Tears and Cuts (Through-Leather Damage): Sharp objects like keys, pocket tools, or pet claws can slice completely through the leather hide. Repairing an open tear requires inserting a structural sub-cloth backing patch beneath the hide to reinforce the repair before applying filler.
3. Punctures and Cigarette Burns: Cigarette embers or sharp items create small melted or charred holes. Burned edges must be trimmed away with precision scissors, filled with a backing patch, and layered with flexible compound.
4. Faded, Scuffed, or Peeling Leather Color: Direct sunlight and abrasive cleaners strip the factory clear coat, leaving faded or discolored patches. This issue requires gentle surface cleaning followed by a color-matched automotive leather dye and matte sealer spray.
5. Hardened or Shrinking Leather: Neglected leather loses its natural moisture, becoming stiff and brittle. While minor stiffness can be rejuvenated with deep leather oil conditioners, severely shriveled leather usually requires panel replacement.
Assessment: DIY Repair vs Professional Upholstery Replacement
Not all leather seat damage should be repaired at home. Use this assessment guide to determine your best course of action:
DIY Fixable (Low Complexity): Minor cracks, scuffs, color fading, and tears under 2 inches on non-airbag cushion panels. Easily fixable at home with a quality $25–$45 DIY leather repair kit.
DIY with Caution (Medium Complexity): Tears between 2 and 5 inches, deep burns, or worn driver-side bolsters. Requires careful layering of backing patches, flexible filler, and custom dye matching.
Seek Professional Repair (High Complexity): Tears over 5 inches, torn seams along side airbag deployment paths, or damaged heated seat heating elements. Professional shop repair recommended.
Full Replacement (Critical Need): Complete leather dry rot, shattered foam seat cushions, or total frame structural failure. Full panel re-upholstery or complete seat replacement required.
Common Causes of Car Leather Seat Deterioration
Understanding what degrades automotive leather helps you preserve your seat interior for years to come:
1. Sun UV Radiation and Heat Stress
Ultraviolet rays bake the essential oils out of leather hides, causing the material to shrink, stiffen, and crack, especially in warm U.S. climates like the Southwest and Florida.
2. Entry and Exit Bolster Friction
Driver side seat bolsters take constant sliding pressure from blue jeans, belts, and jackets every time you enter or leave the car, wearing away the top clear coat.
3. Lack of Routine Moisture Conditioning
Unlike synthetic materials, natural leather requires periodic hydration. Without leather conditioner applied every 3–6 months, the hide dries out and becomes brittle.
4. Harsh Chemical Cleaners
Using household dish soap, bleach, or alcohol-heavy all-purpose cleaners strips protective factory sealant coatings, exposing raw leather to moisture and stains.
Required DIY Tools & Leather Repair Supplies
Before starting your leather seat restoration, gather these essential repair tools and materials:
| Supply / Tool Name | Primary Purpose in Repair | Est. U.S. Price |
| All-In-One Leather Repair Kit | Includes liquid filler, backing mesh, palette knife & dye | $22 – $45 |
| Sub-Cloth Backing Fabric | Reinforces open tears beneath leather hide to prevent re-tearing | $6 – $12 |
| Fine Grit Sandpaper (800 / 1200) | Smooths cured filler flush with surrounding leather surface | $5 – $10 |
| Isopropyl Rubbing Alcohol (70%) | Cleans dirt, grease, and body oils to ensure filler adhesion | $3 – $6 |
| Color-Matched Leather Dye & Sealer | Restores original seat color and protects repair against UV | $15 – $30 |
DIY Safety Guidelines & Work Environment Prep
Working with leather dyes, alcohol solvents, and flexible adhesives requires simple safety precautions:
Ventilation: Work in a well-ventilated garage or outdoors with car doors open. Leather dyes and aerosol sealants release strong fumes.
Skin Protection: Wear disposable nitrile gloves to prevent leather dye and chemical adhesives from staining your skin.
Color Spot Testing: Perform a spot test with leather dye on a hidden lower seat trim piece before applying it to visible seat cushions to ensure exact color blending.
Perforated Seat Tip: If repairing perforated leather seats (seats with tiny ventilation holes), insert toothpicks into holes immediately after applying filler to prevent permanent hole clogging.
Step-by-Step DIY Guide: How to Repair a Torn or Cracked Leather Seat
Follow these detailed steps to repair open tears, cracks, and burns on your car leather seats at home:
Step 1: Thoroughly Clean and Prep the Damaged Area
Wipe down the damaged leather panel with a microfiber cloth dampened with 70% isopropyl alcohol or specialized leather cleaner. This removes body oils, silicone dressings, and dirt that prevent filler adhesion. Allow the surface to dry completely for 15 minutes.
Step 2: Insert Sub-Cloth Backing Patch (For Tears and Holes)
If fixing an open tear or hole, cut a piece of sub-cloth backing fabric roughly 1/2 inch larger than the tear on all sides. Use tweezers to slide the cloth patch under the leather hide. Center the fabric and apply a thin layer of flexible leather glue between the patch top and leather underside. Press firmly and let dry for 20 minutes.
Step 3: Apply Layered Liquid Leather Filler
Using a plastic palette knife or spatula, spread small amounts of liquid leather filler into the crack or tear over the backing patch. Apply in thin layers, smoothing the filler flush with the leather surface. Allow each layer to air-dry for 30 minutes (or use a hair dryer on LOW heat for 3 minutes).
Step 4: Sand Smooth and Apply Grain Texture
Once the final filler layer cures completely, lightly sand the area using 800 or 1200-grit wet/dry sandpaper until the repair is seamless with surrounding leather. Wipe away sanding dust with a dry microfiber cloth. If your kit includes a grain texture pad, press it gently onto warm filler to mimic natural leather texture.
Step 5: Apply Color-Matched Dye and Protective Clear Sealer
Dab color-matched automotive leather dye onto the repair using a sponge or applicator pad, feathering the edges outward into undamaged leather. Apply 2–3 light coats, allowing 15 minutes dry time between coats. Finish with a satin or matte UV leather sealer spray to lock in color.
Common DIY Repair Mistakes to Avoid
Avoid these frequent mistakes to ensure a long-lasting, invisible leather seat repair:
Applying One Thick Coat of Filler: Thick filler cracks when sat on. Always apply 2 to 3 wafer-thin layers, allowing each to dry fully.
Skipping Isopropyl Alcohol Cleaning: Oily leather rejects filler and dye, causing the repair to peel off within weeks.
Clogging Perforated Air Vents: Spreading filler over ventilated seats blocks heating and cooling airflow. Use toothpicks or fine needles to clear holes before drying.
Using Household Super Glue: Super glue dries hard and brittle, cutting surrounding leather hide when weighted.
Car Leather Seat Repair Cost Comparison in the USA
Compare average U.S. pricing for DIY repair kits versus professional auto upholstery services:
| Repair Option | Estimated Cost Range (USD) | Coverage & Scope |
| DIY Leather Repair Kit | $20 – $45 | Fixes multiple cracks, small tears & scuffs at home |
| Professional Mobile Leather Detailer | $120 – $250 | In-person spot repair, custom color matching & filling |
| Auto Upholstery Shop Panel Repair | $250 – $550 | Replaces single damaged leather panel with new hide |
| Full Leather Seat Re-Upholstery | $800 – $1,800+ | Complete seat tear-down, new leather hide & stitching |
U.S. Regional Climate Impact on Leather Seats
Where you live in the United States dictates how quickly your car’s leather interior deteriorates:
Southwest Sunbelt Heat: States like Arizona, Nevada, and Texas experience interior cabin temperatures exceeding 140°F. Intense heat dries out leather oils, requiring monthly conditioning.
Northern Winter Freeze: Northern winter freeze cycles cause leather hide fibers to contract and stiffen, increasing crack risks when sitting on cold seats.
Coastal & Southern Humidity: High humidity in Gulf Coast states encourages mold and mildew growth on unconditioned leather seats stored in damp garages.
Leather Seat Preventative Maintenance Schedule
Routine maintenance keeps car leather soft, supple, and resistant to cracks and tears:
| Maintenance Task | Recommended Interval | Primary Leather Benefit |
| Vacuum Seat Crevices & Seams | Every 2 weeks | Removes abrasive sand & grit that cuts the leather topcoat |
| Wipe Down with pH-Balanced Cleaner | Monthly | Removes body oils, sweat, and dirt accumulation |
| Deep Leather Conditioner Application | Every 3 months | Replenishes natural oils to prevent cracking & drying |
| Apply UV Protectant Sealant Spray | Bi-annually (Spring / Fall) | Blocks solar radiation and prevents color fading |
Frequently Asked Questions (FAQs)
1. How much does professional leather car seat repair typically cost?
Professional leather car seat repair generally costs between $150 and $350 per damaged area, depending on the severity of the tear, crack, or burn. Extensive damage requiring panel replacement can cost $500 to over $1,200. Professional repairs provide accurate color matching and a durable finish.
2. Can I use a DIY kit to repair leather car seats at home?
Yes, minor scratches, small punctures, and shallow cracks can often be repaired at home using a DIY leather repair kit. These kits typically include leather filler, color-matching compounds, and grain-texture materials. Follow the instructions carefully to achieve a smooth, natural-looking finish.
3. What types of damage can be fixed when repairing leather car seats?
Learning how to repair leather seat in car damage can help you address common problems such as split seams, cigarette burns, scuffs, fading, surface cracks, and small punctures. Flexible fillers and specialized leather dyes can restore the appearance of damaged areas.
4. How long does it take to repair a leather car seat?
Minor leather seat repairs, such as filling cracks or patching small holes, typically take one to three hours. The exact time depends on the damage, repair method, and drying requirements. More extensive restorations involving multiple panels may take a full day or longer.
5. How should I properly maintain my upholstery after completing a how to repair leather seat in car project?
To ensure the longevity of your how to repair leather seat in car restoration, regular upkeep is essential. Clean the seats using a soft microfiber cloth and a mild, pH-balanced leather cleaner. Avoid harsh chemical solvents or abrasive brushes, and apply a UV-blocking leather conditioner every few months to prevent future drying, fading, and cracking caused by direct sunlight.
Final Practical Takeaway
Mastering how to repair leather seat in car using a quality DIY repair kit is an incredibly cost-effective way to eliminate unsightly cracks and tears before minor wear turns into permanent structural damage. By taking your time to carefully color-match, fill, and seal the affected leather, you dramatically improve your vehicle’s interior appearance and prevent the split from widening under daily use. Ultimately, tackling upholstery repairs early preserves the comfort and luxury feel of your cabin while safeguarding your car’s overall resale value.