Car Trouble Fixer

How to Repair Cut in Leather Car Seat: DIY Steps, Tools & U.S. Cost Guide

Introduction
Exploring how to repair cut in leather car seat techniques in this introduction is your first step toward decoding automotive interior restoration, understanding flexible sub-cloth backing patches and liquid leather fillers versus professional upholstery shops, and managing your cabin upkeep budget across North America.
Learning how to repair cut in leather car seat damage right in your own garage allows vehicle owners to maintain their interior appearance while avoiding expensive professional shop labor fees ranging from $150 to $400. By stabilizing the tear with a sub-cloth backing patch, sealing the edges with adhesive, and applying color-matched leather filler, you can easily restore ripped or punctured upholstery for just $15 to $40.
Fixing a slice or tear promptly prevents everyday seating tension from pulling the material further apart, protecting underlying foam and preserving your vehicle’s resale value. Let’s explore everything you need to know about evaluating your damage, following kit instructions correctly, and completing a professional-grade DIY leather seat repair.
SIDE AIRBAG SAFETY NOTICE: If the cut is located directly along a side-airbag deployment seam (usually marked with an ‘AIRBAG’ tag on the seat bolster), do NOT use heavy sub-cloth or strong adhesives across the seam. Heavy adhesives can impair airbag deployment during a crash, which directly impacts how you approach repairing a cut in a leather car seat and safety protocols.
Understanding how to evaluate cut severity and leather tension for how to repair cut in leather car seat projects against factory side-impact airbag deployment zones, recognizing the importance of using flexible sub-cloth patches and heat-cure fillers for permanent bonding, and evaluating DIY home repair kits versus professional upholstery shop services empowers vehicle owners to make smart safety and financial choices.
Throughout this introduction and the comprehensive guide that follows, we will explore an in-depth breakdown of how to repair cut in leather car seat options, detailing kit pricing and material matrices (ranging from $15 DIY color-matching repair kits up to $400+ professional panel upholstery services), mechanical wear thresholds (such as minor surface friction cuts versus structural bolster splits), step-by-step sub-cloth insertion workflows, airbag safety compliance guidelines, and practical answers to frequently asked questions to keep your vehicle interior looking pristine, durable, and safe on every American journey.
Understanding Leather Seat Damage Types
Before starting a repair, inspect the cut closely. Leather car seat damage varies in depth and severity, which determines whether a simple cosmetic touch-up or a sub-cloth patch is needed:
1. Surface Scratches and Shallow Slits: Shallow cuts only slice through the top clear coat and dye layer without penetrating the full leather hide thickness. These cuts do not expose underlying white or gray fibers and require color touch-up and light sanding rather than heavy filler.
2. Clean Slices and Razor Cuts: Clean cuts happen when sharp objects (keys, pocket knives, or belt buckles) slice completely through the leather hide. The edges remain relatively straight, making them ideal candidates for sub-cloth backing and liquid leather filler restoration.
3. Jagged Tears and Tension Pulls: Jagged cuts occur along high-stress bolster seams where weight pulls the cut edges apart. These cuts require robust structural sub-cloth reinforcement to handle body weight whenever drivers slide into the seat.
4. Punctures and Foam Core Exposure: Deep punctures go through both the leather hide and underlying yellow foam padding. If foam is missing or torn, it must be leveled with thin foam inserts before backing and filling the leather layer.
5. Cracks and Sun-Baked Spiderweb Tears: Dried-out leather in sunny U.S. climates develops fine surface cracks that join into full tears over time. These require deep conditioning, crack-filling compound, and recoating.
Safety Assessment: Can You Repair It Yourself?
Evaluate the size and position of your leather seat cut before deciding between a DIY repair or professional upholstery service:
Monitor & DIY Repair (Low Risk): Clean cuts under 2 inches long on flat seating cushions or headrests. Perfect for DIY sub-cloth patching and liquid filler kits.
Service Soon (Medium Risk): Cuts 2 to 4 inches long or located on heavily worn entry bolsters. Requires careful sub-cloth reinforcement, multi-layer filling, and precise color matching.
Urgent Professional Repair (High Risk): Large tears over 4 inches, cuts on perforated climate-controlled seats, or damaged seat heaters. Professional upholstery stitching or panel replacement is recommended.
Do Not DIY / Professional Only (Critical Risk): Cuts directly across side airbag seam stitching. Must be serviced by a certified automotive upholstery professional to maintain proper airbag safety release.
Common Causes of Leather Car Seat Cuts
Automotive leather is durable, but daily usage and sharp items can cause sudden slices. Knowing the main causes helps prevent future seat damage:
Most Frequent Causes
Sharp Objects in Back Pockets: Keys, pocket knives, metal purse zippers, and exposed jeans rivets slice seat bolsters when sliding into the car.
Pet Claws & Sharp Accessories: Unprotected dog or cat claws puncture delicate top-grain leather during road trips.
Dryness and UV Degradation: Exposure to intense sun dries out natural oils, making leather stiff and brittle so it splits under body weight.
Structural & Wear Causes
High Bolster Entry Wear: Driver-side outer seat bolsters take heavy friction every time you enter and exit the vehicle, wearing the hide thin.
Child Safety Seat Edges: Unprotected hard plastic child seat bases press sharp corners into rear leather cushions, causing deep indentations and tears.
Required DIY Tools & Materials
Having the right tools ensures a smooth, long-lasting leather repair that blends naturally with your factory upholstery:
| Repair Tool / Material | Primary Purpose in Restoration | Est. U.S. Price |
| Sub-Cloth Backing Patch (Canvas/Mesh) | Inserts behind leather cut to provide flexible structural support | $5 – $10 |
| Flexible Liquid Leather Repair Compound | Fills the cut gap and bonds edges flush with surrounding hide | $12 – $25 |
| Leather Colorant Dye & Clear Sealant | Matches factory leather shade and locks in color finish | $15 – $30 |
| Isopropyl Alcohol (70% rubbing) | Cleans dirt, body oils, and silicones from cut area prior to repair | $3 – $6 |
| Palette Knife / Flexible Spatula & Sandpaper | Spreads filler evenly; 800/1200 grit sandpaper smooths dry filler | $6 – $12 |
Safety Guidelines & Personal Protective Equipment (PPE)
Working with leather chemical cleaners, flex adhesives, and color dyes requires basic workplace safety precautions:
Hand Protection: Wear disposable nitrile gloves when handling isopropyl alcohol, leather adhesives, and color dyes to prevent skin staining and chemical contact.
Ventilation: Perform leather cleaning, filling, and dye spraying in an open garage or well-ventilated driveway to avoid breathing chemical solvent fumes.
Heated Seat Safety: Disconnect heating element connectors under the seat before using heat guns or hairdryers to accelerate filler curing times.
Foam Protection: Use smooth-tipped plastic tweezers or spatulas when tucking sub-cloth underneath cuts to avoid poking holes in underlying seat foam.
Step-by-Step DIY Guide: Repairing a Cut in a Leather Seat
Follow this professional step-by-step procedure to fix a cut in your leather car seat with seamless, durable results:
Step 1: Clean and Prepare the Cut Area
Wipe the damaged area thoroughly with a clean microfiber towel dampened with 70% isopropyl alcohol. This removes surface dirt, body oils, and leather conditioners that prevent repair adhesives from sticking. Let it dry for 10 minutes. Trim any loose, frayed leather fibers around the cut edges using small curved fingernail scissors.
Step 2: Insert and Secure the Sub-Cloth Backing Patch
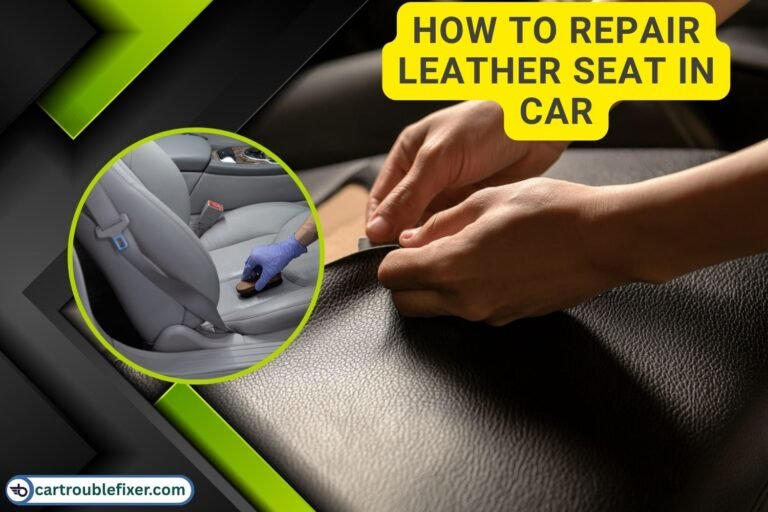
Cut a piece of durable canvas, denim, or woven mesh sub-cloth patch approximately 1/2 inch larger than the cut on all sides. Round off the patch corners so sharp edges do not catch. Using tweezers, slide the sub-cloth patch completely through the cut, centering it underneath the leather hide. Apply a thin layer of flexible leather adhesive between the underside of the leather and the patch, then press firmly for 2 minutes.
Step 3: Apply Liquid Leather Repair Filler
Using a plastic palette knife or spatula, apply small amounts of flexible liquid leather filler compound directly into the cut gap. Press the filler firmly into the slice to bond with the sub-cloth backing. Spread it level with the surrounding seat surface. Apply thin layers, allowing each layer to dry for 20–30 minutes (or use a hairdryer on low heat for 3 minutes).
Step 4: Smooth and Texture the Cured Repair
Once the final filler layer cures completely (2 to 3 hours), gently sand the filled seam using wet 800-grit sandpaper followed by 1200-grit sandpaper until completely flush with surrounding leather. If your seat has a pronounced grain pattern, press a textured leather graining paper onto the warm, semi-cured filler to duplicate the factory look.
Step 5: Apply Color-Matched Dye and Clear Topcoat Sealant
Dab color-matched water-based leather dye onto a clean microfiber sponge. Gently feather the dye outward from the repair center into the surrounding original seat finish. Apply 2 to 3 thin coats, allowing 15 minutes between coats. Seal the repair with a satin or matte clear leather protective topcoat to shield against UV fading and friction wear.
Common DIY Repair Mistakes to Avoid
Avoid these frequent mistakes that result in stiff, noticeable, or short-lived seat repairs:
Skipping the Sub-Cloth Backing Patch: Applying filler directly into a deep cut without a backing patch causes the filler to crack and fall through when someone sits on the seat.
Applying One Thick Coat of Filler: Thick filler coats trap moisture, stay rubbery underneath, and wrinkle instead of curing smooth. Always build in thin layers.
Using Standard Household Glues: Standard household glues dry stiff and brittle. They create hard lumps that ruin leather flexibility and tear hide further.
Inexact Color Matching: Testing dye directly on the repair without checking on an inconspicuous area first leads to visible blotches. Always test dye on undersides.
Leather Car Seat Repair Cost Breakdown in the USA
Comparing DIY materials against professional auto upholstery repair shop options helps you make the right choice for your budget:
| Repair Method | Estimated U.S. Cost Range (USD) | Scope of Work & Warranty |
| DIY Complete Leather Repair Kit | $15 – $40 | Includes sub-cloth, filler, sandpaper, spatula & basic dye colors |
| Professional Mobile Leather Technician | $120 – $220 | On-site repair, professional color mixing & blend warranty |
| Auto Upholstery Shop Repair | $180 – $350 | In-shop repair, sub-panel stitching & factory topcoat sealing |
| Full Seat Panel Replacement | $350 – $750+ | Replaces entire leather panel section with original OEM leather hide |
U.S. Regional Climate Impact on Leather Car Seats
Geographic location and ambient weather directly affect leather seat longevity and repair curing times across the U.S.:
Southwest Sunbelt UV Heat: High temperatures and sun exposure in Sunbelt states (Arizona, Nevada, Texas, Florida) dry out leather quickly. Apply UV-resistant sealants every 3 months.
Northern Winter Cold: Cold winter temperatures slow down liquid filler and dye drying times. Use heated garages or low-temperature hairdryers during winter repairs.
Coastal & Gulf Humidity: High humidity in Gulf Coast regions accelerates mildew growth inside seat foam if cuts remain unsealed and exposed to moisture.
Leather Seat Care & Maintenance Schedule
Routine maintenance keeps automotive leather soft, supple, and resistant to cuts and cracking:
| Maintenance Task | Recommended Frequency | Primary Protection Benefit |
| Vacuum Seams & Cushion Crevices | Every 2 Weeks | Removes abrasive grit that wears down topcoat dye |
| Gentle pH-Balanced Leather Cleaning | Every 1 to 2 Months | Lifts body oils, dirt, and sweat stains without drying |
| UV Leather Conditioner Application | Every 3 Months | Restores essential oils, preventing stiffness and splits |
| Child Seat Under-Mat Protection | Continuous | Prevents hard plastic edges from puncturing leather hide |
Frequently Asked Questions (FAQs)
1. Can I repair a rip or tear using a DIY leather repair kit?
Yes, minor cuts and tears in leather car seats can often be repaired at home using a DIY leather repair kit. These kits typically include backing fabric, flexible adhesive, filler compounds, and grain texture paper. For large tears or damaged seams, professional upholstery repair may provide better results.
2. What materials and tools are needed for how to repair cut in leather car seat effectively?
To properly execute how to repair cut in leather car seat, you will need rubbing alcohol or leather cleaner for surface prep, a sturdy mesh sub-patch or backing fabric, a flexible vinyl-leather adhesive or filler compound, a putty knife or spatula, liquid leather dye matched to your interior color, and grain texture transfer paper to recreate the factory look.
3. How should I prepare the damaged area before repairing a leather car seat?
Start by cleaning the damaged area with a suitable leather cleaner to remove dirt, oils, and residue. Carefully trim loose fibers around the cut without enlarging the damage. Make sure the surface is dry before placing the backing patch beneath the tear for a smoother repair.
4. How long does it take for leather seat repair adhesive and filler to dry?
Drying time depends on the adhesive and filler you use. Some adhesives bond within 15 to 30 minutes, while filler compounds may require additional drying time between layers. Always follow the product instructions and allow the repair to cure fully before using the seat.
5. How do I maintain a repaired leather car seat?
Clean the repaired area with a soft microfiber cloth and a leather-safe cleaner. Avoid abrasive scrubbing, harsh chemicals, and excessive moisture. Use a compatible leather conditioner when appropriate, and follow the repair product’s care instructions to help preserve the finish and prevent further damage.
Final Practical Takeaway
Mastering how to repair cut in leather car seat issues using a professional DIY kit is a cost-effective way to restore your vehicle’s interior aesthetics and prevent minor tears from tearing further under daily use. By taking your time to carefully clean the leather, apply a secure backing patch, and blend the color compound, you can achieve a durable, professional-looking repair without paying for expensive upholstery replacement. Ultimately, addressing leather cuts promptly preserves your car’s interior luxury, prevents foam padding damage, and maintains the overall resale value of your vehicle.